See here for an update from March 2017 on how the chair has survived three years in the sun.
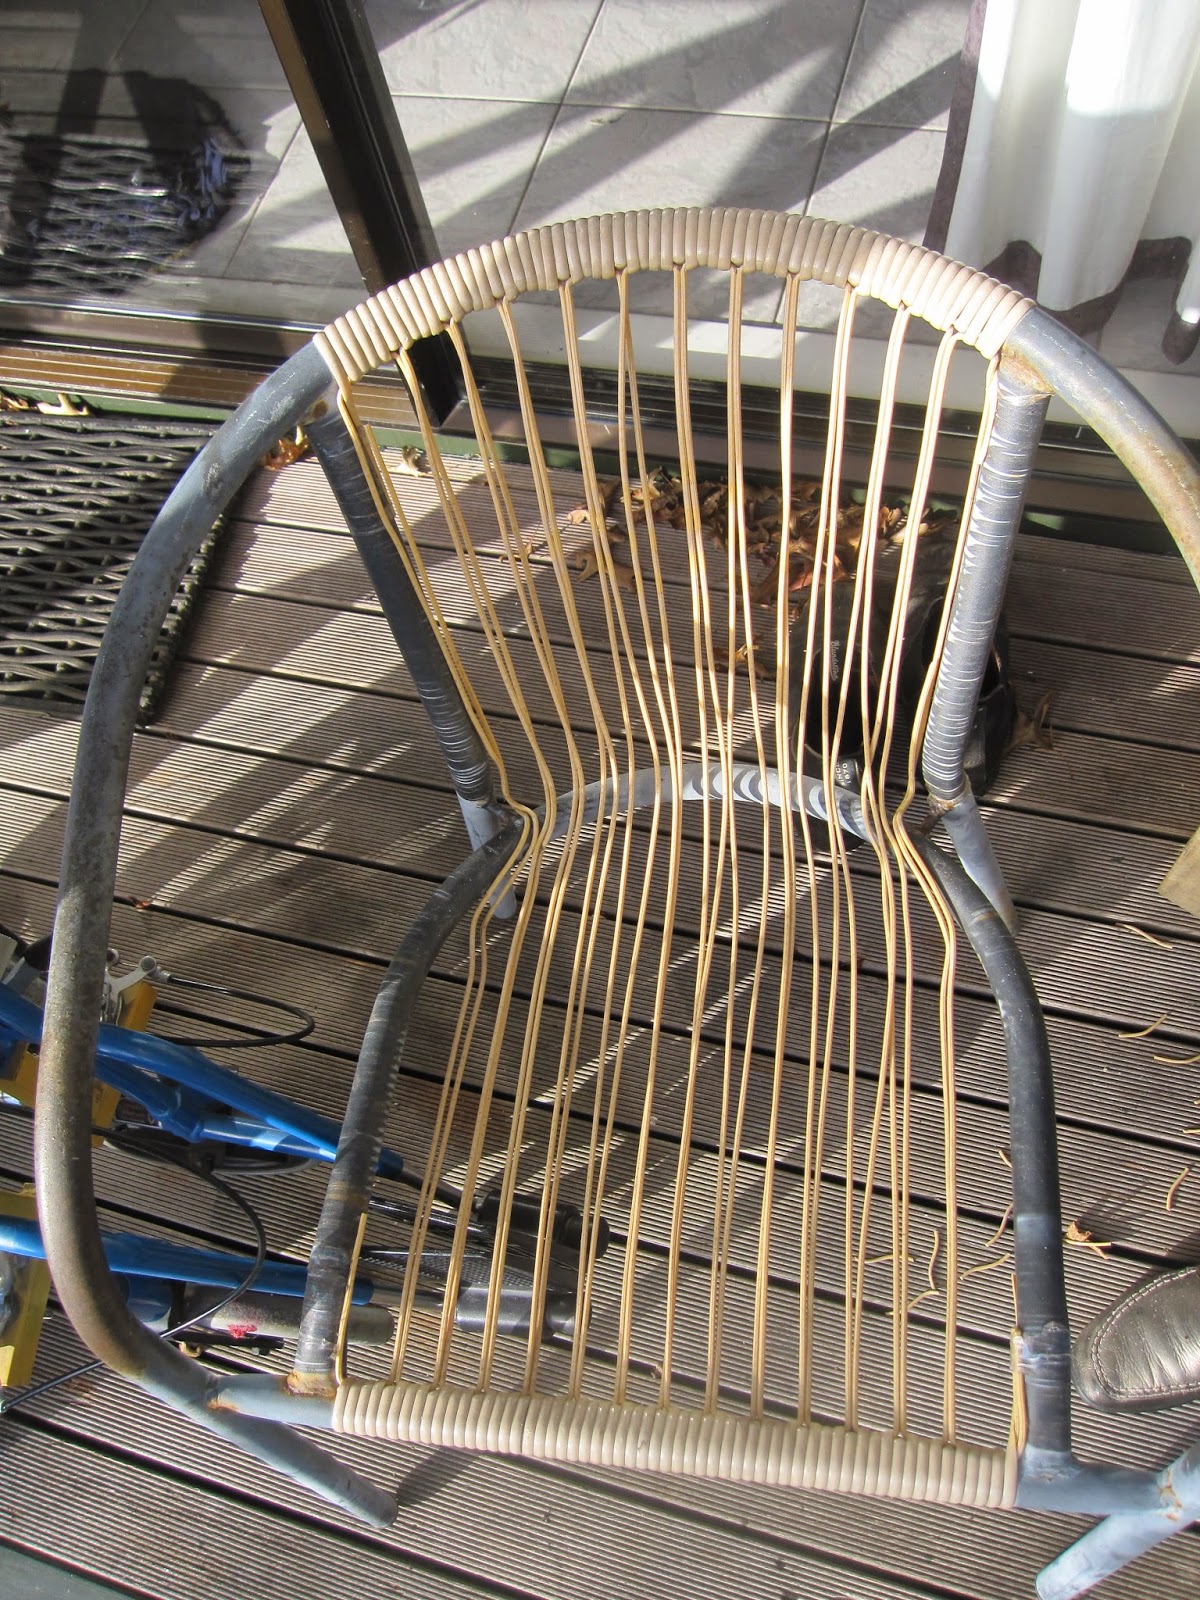
The plastic 'cane' on one of our outdoor chairs recently started to snap all down one side:

The chair was still usable, but clearly wasn't going to stay that way for much longer!
Inspired by my success with our bathroom stool, I decided to weave a new seat for it out of old bicycle inner tubes.
It took:
- 4-5 inner tubes cut into 1 inch strips lengthways (they came in two different widths, so some gave two strips and some gave three). I forgot to count the tubes before I cut them up so I'm not exactly sure how many I used!
- 7 'sessions' of 30-45 minutes each (two to prep the tubes, two to cut off the old cane, one to thread the length-ways parts of the chair seat and two to do the actual weaving);
- scissors (to cut the strips of inner tube), a bucket and rag (to clean the tubes - the insides are powdered with talc), secateurs (to cut the cane), a stanley knife (used in joining strips of inner tube together) and sellotape (to secure the tubes while part of the work was in progress).

As I couldn't find any tutorials online for doing such a thing, below are some notes on how I went about it.
Please note, the chair lasted about three years (in full sun, in New Zealand where the the sun is uncommonly harsh) before it needed 'recaning'. Click here to see the deterioration in the rubber that had occurred after three years.
Prepping the tubes
Cut the inner tube crossways just next to the valve, giving a long tube. Next cut it lengthways so it's a long strip 2-3 inches wide. Shake it hard to remove as much as possible of the talcum powder that coats the inside.
Cut out the valve. Cut it into 2-3 strips about one inch wide (there are lots of lengthways seams and markings on inner tubes so keeping your cuts straight is easy).
Immerse each strip in a bucket of water, then draw it through a wet rag as you remove it from the water. This should remove most of the remaining talc from the rubber.
Processing 6 or 7 tubes took me two sessions of 30-45 minutes, but I actually only needed 4-5 inner tubes for this project.
Removing the existing cane
I used a pair of secateurs and cut the crosswise pieces of cane next to the lengthwise ones. I had a drop cloth under the chair to collect all the bits, and cut next to every second lengthwise strip.

As I cut, I tried to pay attention to how the chair had been put together. For example, in the photo below you can sort of see that the outermost lengthwise strips were bound to the frame until a few inches into the seat portion, meaning that there are effectively fewer lengthwise strips on the narrower portions of the chair than where the seat flares.

When all the cross-wise pieces were removed it was clear that the lengthwise pieces were under a lot less tension than I had expected. I presume that the firmness of the seat mainly comes from the tension of the crosswise strips, and keeping the lengthwise ones a little looser makes it easier to weave through them.
Having had a good look at the construction, I removed the lengthwise pieces, leaving a bare frame. You can see that it has some surface rust but it still seems to be otherwise sound. It would probably have been better to sand and repaint it at this point but I didn't do so!

Putting on the lengthwise strips
I initially intended to tie each of the lengthwise strips to the chair individually. However, after I got started it seemed easier to simply loop them back and forth as a single long strip - just like I used to do when I made tiny woven rugs as a kid :-)
I cut a slit at one end of a strip then passed the strip over the top of the chair frame and out through the slit, thus securing it to the chair. I taped this first strip to the side of the chair frame: it won't be used in weaving the back of the chair, it's only used for weaving where the chair flares on the seat portion.

Whenever I came to the end of one strip I joined it to the next one using a slit and loop joins (see step 5 in this rug making tutorial for a gif of the technique). As much as possible I kept the knots to the back of the weave, but some of them are on the front and they're neither uncomfortable nor particularly unsightly.
Here is the chair all laced up. Note that I've taped the outer most strips to the frame at the top of the back and the back of the seat. I removed this tape when I got to those sections in the weaving, but they kept those pieces out of the way and also meant I didn't use them in weaving by mistake.

I found that trying to weave the crossways portions with the lengthways strips all loose like this was very hard. After persisting for a few rows, I decided to undo those rows and secure the lengthways strips before proceeding.
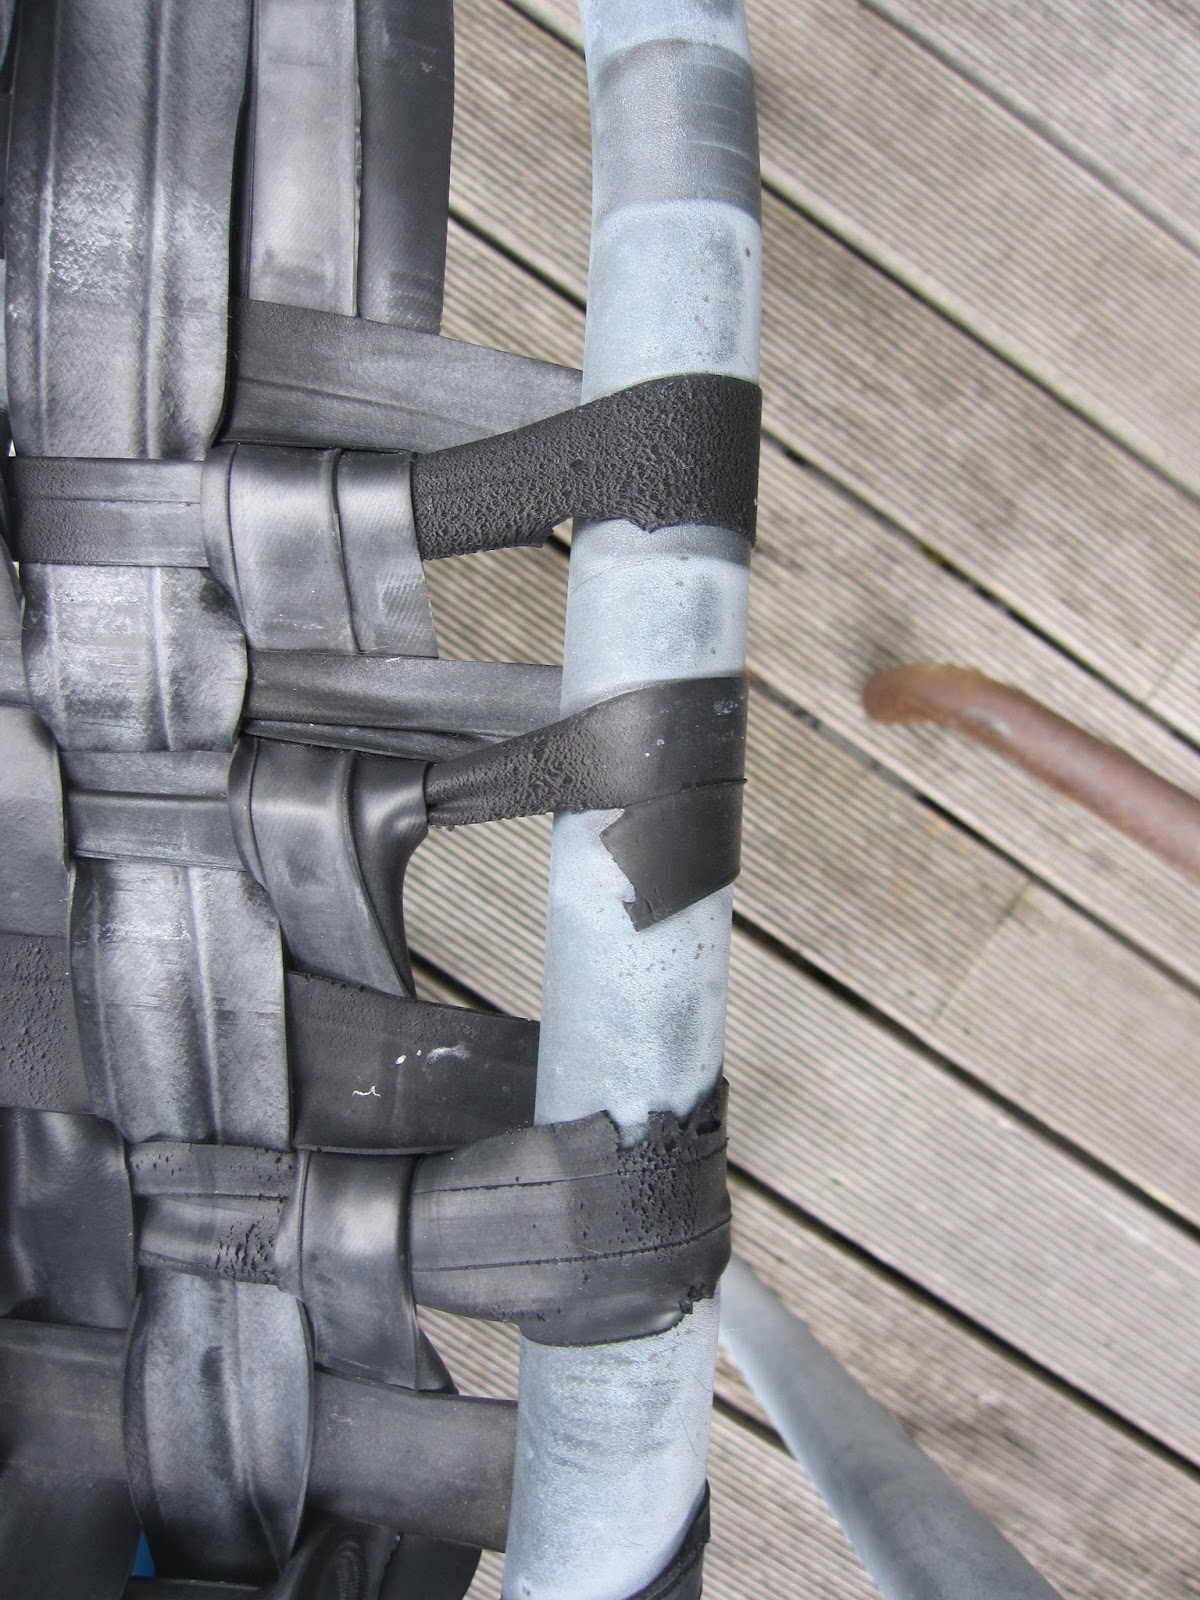
I made sure all the lengthways strips were of more or less equal length then taped the strips at the top of the chair to temporarily keep them in place. Then I whipped a spare strip of inner tube over them one by one, securing them to the seat tube at the back of the seat. This tensioned them and made the weaving much easier!

Weaving the seat
I didn't tie off my work after threading all the lengthways strips onto the chair: I simply continued with the same continuous piece of rubber. At the end of each row of weaving I stretched the rubber as taught as I could, then held it firmly with my finger while I turned it over to start the next row. This tension is what would make the seat actually hold someone's weight so it was very important!
After I got to the point where the outermost strips were no longer required (and would simply be pressed onto the framing tubes from here on) I removed the whipping cord. Here's the chair just before that strip was removed.

And here's the finished chair! To finish, I simply knotted the end of the inner tube to the back of the weaving and cut it off with the stanley knife.

Note that I tried to do some fancy weaving on the chair back as had been done on the original chair but it didn't look right. I think that the inner tube weaving isn't uniform enough for something like that to look like anything other than a mistake.
My chair seat is a little looser to sit on than would be ideal, and I may well go back one day and reweave it, tensioning the lengthwise pieces a little more. However, as it's functioning OK right now, that may never happen!
Three years on
 |
| From time to time over the three years since I originally wove the chair, one of the rubber strips would snap and the two ends would slacked and retract back. |
 |
| Each time that happened, I rewove the strips through their original paths, pulled them tight and knotted the ends together. |
 |
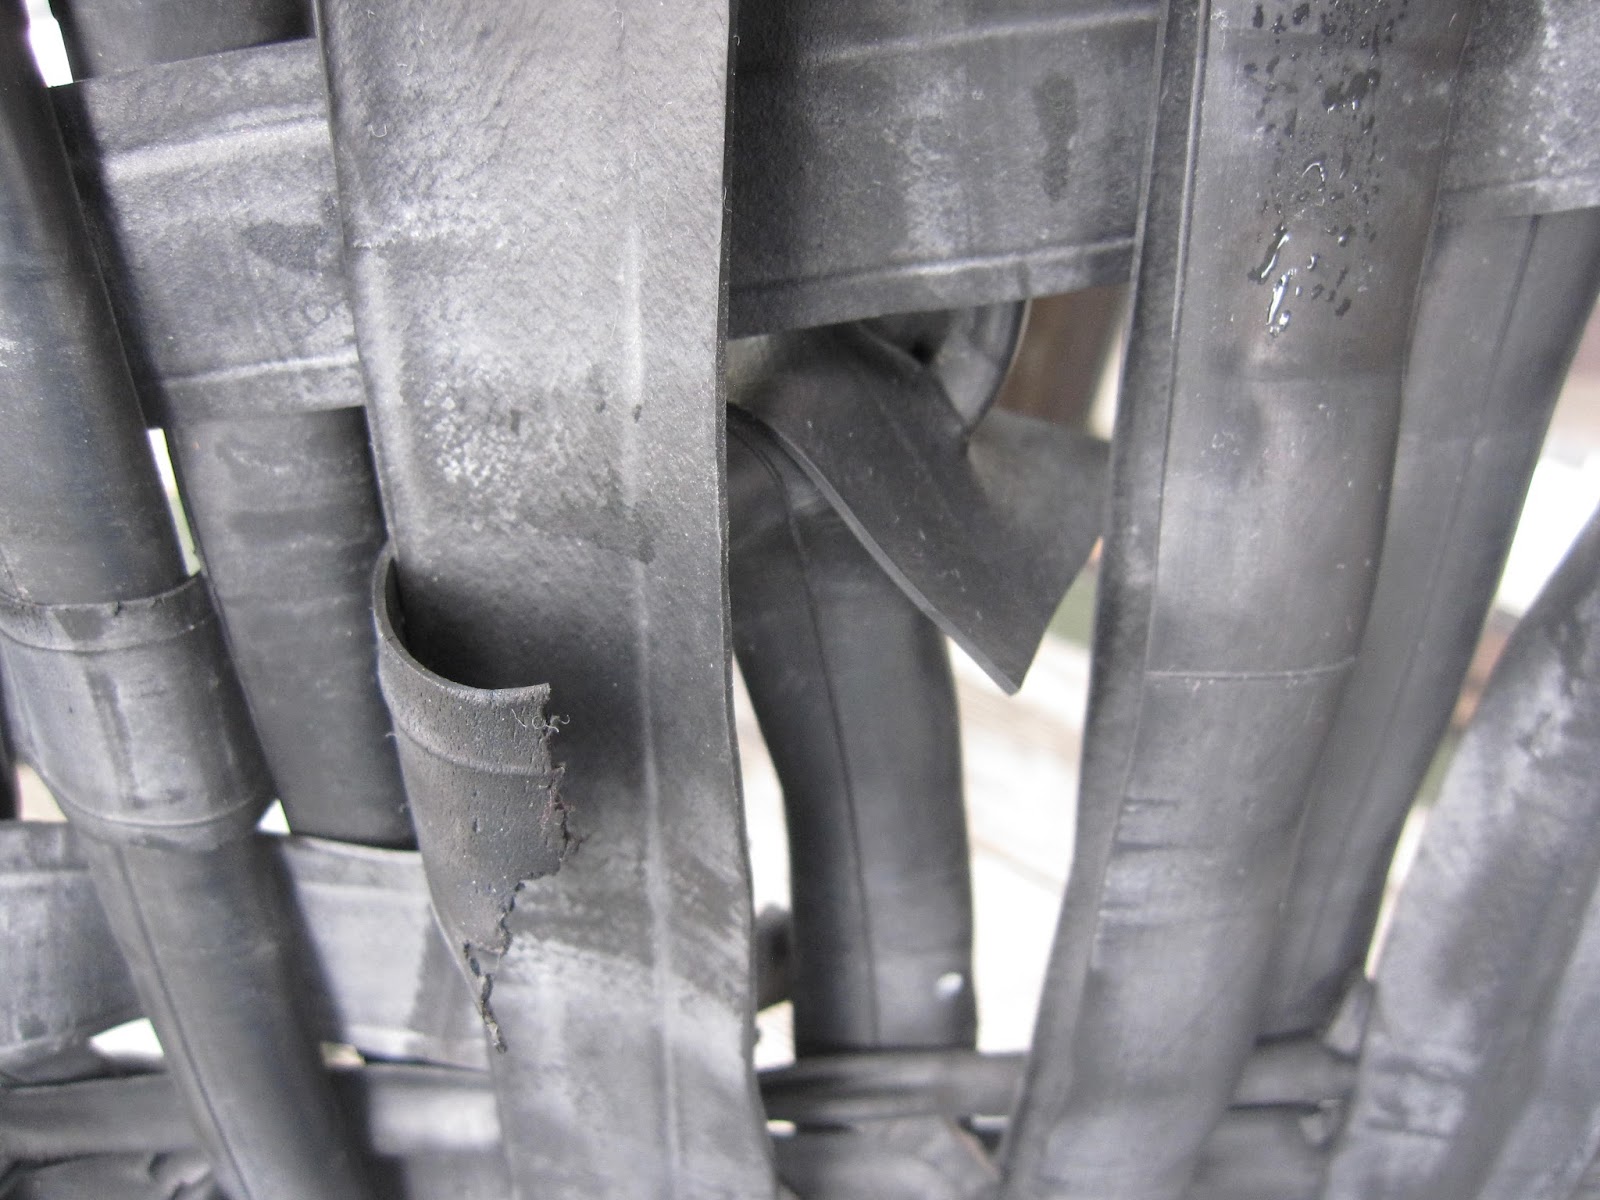
| Recently (after three years in the sun), that has started to happen much more. There are now so many snapped strips that it no longer seems worthwhile reknotting them - plus it's getting hard to do so as so much length has been lost through the knotting! |
 |
| Many more places are also clearly about to snap. |
So, after three years, the time has come to 'recane' the chair. Surprisingly, though, despite the damage and the many broken strips, it can still hold my 110kg weight without problems, so I'm not in much of a hurry!


No comments:
Post a Comment